Today, we kept working on our Hendrix-Chenault theater. I was able to add on a lot more details and angles to the drawing to make it feel more real. I added on lines for each of the panels of the entrance to the theater, the ceiling, the stairs, ramp, and double doors at the left side of the theater, and I've started to draw the stairs going upstairs. I have not finished drawing that, though so it doesn't look right in this picture, but I hope to be almost completely done with my drawing the next time I have class. Over all though, I am really excited to see my drawing become more realistic looking. I'm very pleased with it so far and can't wait to do more on it.
Today, we officially started drawing the Hendrix-Chenalt theater. For the last class, we just drew a practice of the theater in one class period so we could know what to change for the real drawing. But for this time, we have four periods to draw it. However, it is a major grade so we really have to pay attention to all the angles and details of the theater. I felt like I knew what I needed to fix from my old drawing, so I was able to work on that today. When I first drew the theater, I wanted to use no vanishing points and just do it by sight. But, it came out all wrong. So, today I used the vanishing points, which really helped me not only get the proportions but also the lines for each of the panels in the wall. Even though the drawing I drew today is much smaller from the drawing I drew yesterday, it is in proportionate and has more details. I am really happy with what I have drawn so far. We have three more class periods to finish it up, so I think that will give me enough time to draw in the extra parts of the theater, i.e. the stairs, the hallways on the side, the ramp, and the wall above the theater entrance. I can already see my improvement in this drawing from yesterday, so I am really excited to add on more to it and see how it turns out.
Today, we went to the outside of the Hendrix-Chenalt Theater and attempted to draw what we saw. I decided to sit on the floor a little to the right of the theater. We were allowed to either use vanishing points or the "clock" method, so I decided to use the "clock" method to practice it, especially since I wanted to make my drawing bigger than what the drawing would look like if I had used the vanishing points. I think I might need to use the vanishing points next time because my drawing came out completely disproportionate and it didn't even end up having the right angles. I really did try to make it look the most realistic as possible with the time we had to draw it, but I just couldn't get it down. Thankfully, this was just a practice drawing so it actually didn't count, but we will be drawing the real thing in the next class. But, when I start that drawing, I will have Mrs. Story make sure I'm setting every thing up right and then I will try to enhance the drawing from there with every thing I have learned this semester. I hope it will come out better than this drawing!
Today, we took a quiz using the "clock" method to draw the boxes on the table. For using the "clock" method, one holds the ruler or triangle tool straight to the picture and just turns the tool around to line up an edge with the edge of a box. Then, one quickly transfers that angle to his paper and after a while, the boxes all start to look real. After I had somewhat mastered this method, I then took my pencil and shaded the sides of the boxes to make it look more realistic. However, I did have a hard time figuring out the "clock" method, because every time I got the angle set up right, I couldn't transfer it properly to my page. And then the angles for each of the boxes were not proportionate, so I really had to work hard to get the boxes to look real and stacked on each other. But, for the time I had to draw this, I think I did a pretty good job. Of course, I could always work more on the new "clock" method, but because it was only my second time drawing the boxes using that method, I think I did a pretty good job.
Today, we completely finished our house drawings and learned how to draw skyscrapers. We started out with 2 vanishing points, but then we added a 3rd to the bottom of the page and started drawing our figure on that. After we had created our rectangular box, we then added windows to enhance the feeling. We then turned our paper to the other side and Mrs. Story showed us how to make a morphed building. In this drawing, we not only used the 3 vanishing points, but we also added a 4th point to the top middle of the page and another point to the left but below the horizon line. We drew the lines from the top vanishing point to the bottom vanishing point and then made the line curved at the middle point. We did this 2 other times and then we added in our lines to make the windows and we smoothed out the point where the lines meet by making the lines curved. I started drawing this morphed building up above, but as you can see I'm not yet finished with it. It does look very interesting, like part of the building is coming towards you while the other parts are straight up and down but towards different points. I really do like what I have done on this drawing so far. I would like to finish it up and make the lines more curved and darker so it looks more natural, but over all, I really like how I was able to use all 4 vanishing points to create such a unique image.
After we finished drawing our car, Mrs. Story refreshed our memory on how to draw houses. She showed us how to draw the basic outline of the house, and then she wanted us to draw a house on our own with our own creativity. I started with two simple boxes on the horizon line and then added a third box above the horizon line to give the drawing a more creative style. However, I drew the first two boxes on the horizon line first and drew some detail on them to enhance the feel of the image and to use some of the "house" things Mrs. Story wanted us to add to our drawings. From her list, I added at least 8 windows, a balcony, an awning, and a few more things. However, I realized that I would make the house too much like the house Mrs. Story drew on the board, so I knew I needed to add another extra component to my house to enhance its feeling. I ended up adding the third box above the horizon line and made it into a tree house. I put the windows at different levels so I could show my creativity, I added both brick and stucco to the side of the house so I could show more texture, and I added 4 chimneys to the top of the roof to not only let that component of the house match with the other parts of the house, but also to put them up there for decoration without needing a standard roof. I then added a nice, large tree and a ladder that leads up to the house so an observer can tell how to enter and exit the building. Lastly, I furnished the yard with a few trees, bushes, and a gravel walkway. I am personally very pleased with my work on this. I was not expecting to end up with such an interesting drawing, but I actually really like it because it stands out from the drawings of normal homes. I also liked how I made a point to use all different types of texture: brick, stucco, wood, and stone. Like I said earlier, I am really pleased with how this drawing turned out.
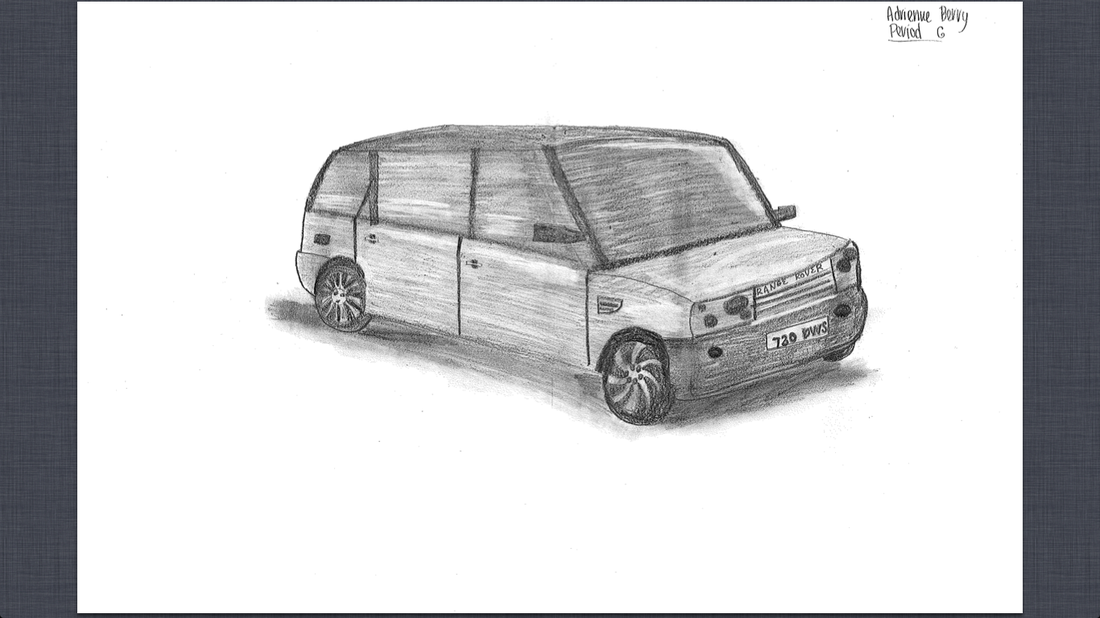
Because my last car that I brought in was not a front-side view, I was asked by Mrs. Story to make another one with the front-side view. I decided to pick a Range Rover because I have always liked Range Rovers and I thought it would be fun to draw this one. Like I had said on my last post though, the outline of the car just helped me get it's "shape", but the actual reality of the car came through the shading. I again used a piece of paper towel to smudge the lead together and make it have a softer feel. I tried to put enough detail into the wheels and front of the car so an observer could tell it was a Range Rover, but because I started on this car late and only had one day to complete it, I was not able to put all the time I wanted into it. Therefore, if I had more time, I would have worked more on the details and shape of the car. But, over all, I think I did a pretty good job on the car in a short amount of time and I was content with my result.
For the last class, we learned how to draw a car. At first, we drew our two vanishing points and then made the outline of the car by drawing one large box (matching up with the two vanishing points) and one small box in the front (also matching up with the two vanishing points and the larger box). That is as far as we got because we took a quiz in the last class and ran out of time for our new lesson. Today, we were able to really work on the drawing. I started with the one large box and slowly transformed that box into the body of a car. I sketched some round lines around the box to get the outline of the car and then drew my windshield by lining the lines up with the two vanishing points. Even though I was supposed to finish this in class, I was not able to because I had taken up much time to draw the detail of the car's tires, headlights, and front grill. So, I ended up taking this car home and spending an extra 30-45 minutes on it, touching it up. After finally finishing the main lines of the car, I then shaded it in, using a paper towel as Mrs. Story had recommended, to really give the shading a smooth and soft look. I had a little hard time drawing the actual box of the car and the lines to give it shape, but I think the shading really helps spruce it up and make it more realistic. Without the shading, my car would've looked realistic. But by smudging the pencil lead together, I was able to create a somewhat realistic car. I feel pretty good about this car. I realize that if I had more time, I would probably redo the back of the car, (since it looks kind of diminished), but over all, I really liked what I drew. The day we turned in the car, we also started drawing a new car of our own. I decided to bring in my granddad's old car, a Jaguar 1965 xke roadster to draw.The car over all is really pretty, but I also have some very nice memories in this car. So, I decided to draw it. I know it is not a front side view of the car, but if I did the front side view of this car then it would not come our right because the hood is very long and the body of the car would look completely diminished. Plus, I really wanted to draw it from a side view. I ended up drawing the large box again, but I did not draw the small box in the front. Instead, I followed the picture that I brought of the car and drew the body of the car first, and then the tires (with their detail), and then I cut off the front and back of the car to give it that nice curve. Then, I drew the windshield and back seat, and finished up by drawing the doors and shading. I was surprised I could do all of this in one period, but I still would like to do a few more touchups to just enhance the reality of the car. Like, I would like to try and make my lines straighter, the front of the car more curved, instead of pointed, and the shading a little more soft. For the shading, I noticed the darker areas underneath the car and the lighter areas on the side of the car. Even though my own sense did not want me to draw these enhancements, I fought against my mind and still drew the shading in that way. And, in the end, I think it looks fabulous! :) I am really satisfied with this car, I think it came out great. I thought it would be really hard because it was not a front side view, but it ended up being really fun and easier to draw than I had expected.
|


 RSS Feed